Geog 458
Lab2: Editing data and RMS error
January 25, 2006
The task for this lab is to conflate TIGER/Line road with control points from an independent data set of greater accuracy. This lab will emulate problems you will be encountered when you have to work with data from different sources (different coordinate systems, different positional accuracy, and so on).
We need three data sets
(1) TIGER/Line road
(2) Horizontal Accuracy Control Points
(3) Aerial photo
TIGER/Line is a test data you will be editing, serving as a source layer (dashed line); Horizontal accuracy control points will be used as a target layer with higher positional accuracy (this is a point instead of a line data unlike a figure shown below).
Open Lab2.mxd at P:\geog458win06\Conflation
Examine positional
accuracy of TIGER/Line relative to reference points
As you can see, discrepancy between test points (intersection of TIGER/Line road) and control points is not trivial. We will edit the position of TIGER/Line road in reference to controls points through rubber-sheeting procedures.
Export data for
editing
Create your own working directory
Click Select Feature tool ![]() ,
and draw the rectangle around orthophotos to select features. Right mouse click
on the layer tgr53033lka in the table of content, and point to Data – Export. Save
the selected features in your working directory as shown below.
,
and draw the rectangle around orthophotos to select features. Right mouse click
on the layer tgr53033lka in the table of content, and point to Data – Export. Save
the selected features in your working directory as shown below.

Do the same thing for the layer control. Now you can turn off original files in the table of content. Also save a mxd file as myLab2.mxd in your working directory.
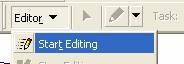
Add Editor toolbar by choosing View – Toolbars – Editor
When Editor toolbar is added, click Editor button and then Start Editing as shown below.
When Start Editing dialog box pops up, choose your working directory for editing.
You will get the following message. Please read it carefully. How are their coordinate systems different? How do you know in which coordinate systems are they in?
How do they appear to be in the same coordinate systems in ArcMap?

Click Cancel.
Click right-mouse click on the layer myTiger in the table of content, and point to Properties…. Click source table. Read contents under the frame Extent and Data Source. Can you guess in which coordinate system is this data stored? Is the content correct? Is there any discrepancy between what is shown in properties dialog box and Spatial_Reference_Information in metadata? Metadata can be found from tiger.html at P:\geog458win06\Conflation.
Do the same thing for myControl.
If you edit data stored in different coordinate systems, what would be potential problems?
Change coordinate
systems
Changing coordinate systems is left up to you. Use help file. Type in keywords in index tab, such as Projections toolset (Data Management toolbox), described. Read carefully the tool “Define Projection” and “Project” in particular.
For saving time (it doesn’t mean you’re waived from doing this; changing coordinate systems and reading metadata are a real good practice for you), I omit this procedure and assume data (my Tiger and myControl) are now stored in the same coordinate systems.
Rubber-sheeting
From Editor Toolbar, click Editor and then point to More Editing Tools – Spatial Adjustments. Now Spatial Adjustments toolbar is added. This tool provides functionalities such as Transformation, Rubber-sheeting, and Edge-matching as we covered in the class. This tool will not be activated until you’re in edit session.
Click Editor button in Editor Toolbar, and point to Start Editing. You will get the same message as before, but this time let’s assume they’re in the same coordinate systems. Click Start Editing button after choosing your working directory for edit.
Browse through Spatial Adjustments Toolbar. As you can see, more menus are activated. Among them, click Set Adjust Data… Check radio box next to All features in these layers, and click OK button.

Click Adjustment Methods and Rubbersheet in the submenu.
From Editor toolbar, point to Snapping… (this is an important step, please do not miss this step). Choose Vertex for myTiger and Edge for myControl. This lets you snap vertices of myTiger to Edge of myControl. If it doesn’t make sense to you, please go back to the class and what vertex is and what edge (basically node in this context) is. This will make it very convenient to improve your error-prone editing.

In Spatial Adjustment toolbar, choose the button New
Displacement Link ![]()
From the upper left, point displacement link to the intersection of myTiger, and then point the link to myControl.
![]()
The displacement link will be automatically snapped to myControl as you set up in a snapping dialog box earlier.
![]()
Do the same thing for others (you should place a displacement link from intersection of myTiger to corresponding myControl). Don’t forget you’re adjusting myTiger to myControl (with better quality). So the displacement link has an arrow pointing from myTiger to myControl. Doing this in the opposite direction will worsen data quality instead of improving data quality.
In Spatial Adjustment toolbar, click the button View Link
Table… ![]() The link table stores source and
destination location in x, y coordinate.
The link table stores source and
destination location in x, y coordinate.
When you’re finished with placing replacement links, save this link table as a file by pointing to Links – Save Links File… in Spatial Adjustment toolbar. Save the file in your working directory, let’s say myLink.txt.
Now it’s time to perform rubber-sheeting as you add replacement links. Click Adjust from Spatial Adjustment toolbar. See how myTiger is realigned to myControl. Does it have a better positional accuracy? How would you say about the accuracy of the data myTiger?
Choosing Stop Editing from Editor Toolbar will save the edit permanently. The edit will be written to myTiger.
REVIEW QUESTIONS
1. From the metadata, find out spatial reference information for those data. Put down the coordinate systems accordingly.
|
|
Coordinate systems (e.g. Geographic, State Plane, UTM) |
Measurement unit (e.g. meter, feet, decimal degree) |
|
TIGER/Line road |
|
|
|
Control points |
|
|
2. Describe procedures employed to change coordinate systems in ArcGIS. If you encounter any problems with doing this, be sure to mention them.
3. Download orthophoto from City of
4. What is RMSE for your rubber-sheeting? You can calculate this from a new link table that results from your rubber-sheeting at your home area. For your convenience, open the link text file in Excel and do the calculation using available function in Excel. Report on how RMSE is calculated from a link table (excel calculation sheet will do), including a link text used for the calculation.
Due by February 6th 2:30pm Monday (please note change from the syllabus)
Point: 15/200
Expected completion time: 2 – 5 hours depending on your computer skills
Some problems and questions can be addressed better by verbal communication than e-mail communication. Please make the use of my office hour on Wed, Fri 9:30-10:20am
Appendix: Data Source
(1) TIGER/Line 2000
Go to http://arcdata.esri.com/data/tiger2000/tiger_statelayer.cfm?sfips=53 (link from WAGDA). This is a good resource if you’re interested in census data. If you choose the drop-down list (Select by Layer) on the right, you will find out what kinds of data are available. It provides cartographic boundary file such as county and census tract. In addition, it provides summary file, that is attribute data such as population, income, educational attainment, housing, poverty level, and so on. Choose Line Features – Roads from Select by Layer drop-down list. Click Submit Selection button (it’s almost in the bottom). Check the box next to King and click Proceed to Download button. Save the file in your working directory. Zip data includes shapefile as well as pointer to metadata (readme.html). Its metadata can be viewed at
http://www.census.gov/geo/www/tiger/rd_2ktiger/tlrdmeta.txt
(2) Horizontal Accuracy Control Points from City of
Go to https://wagda.lib.washington.edu/GIS/UWonly/data/seattle/default.html
This is UW restricted. Find Horizontal Accuracy Control Points to download it (It’s in the bottom). Also remember to look up metadata (this is the link to metadata of this data: https://wagda.lib.washington.edu/gis/uwonly/data/seattle/metadata/cd_2a/geoguide.htm
(3) Orthophoto from City of
Go to https://wagda.lib.washington.edu/GIS/UWonly/data/seattle/cgdb/cgdb_imagemap/overview.html
Choose UW campus area (ortho297) or your home area from the tile.
Its metadata can be found at
https://wagda.lib.washington.edu/GIS/UWonly/data/seattle/metadata/banner.htm